<img height="1" width="1" style="display:none" src="https://www.facebook.com/tr?id=792695931297257&amp;ev=PageView&amp;noscript=1">

Upgrade your accounts recievable with Chaser customizable invoice template library

Struggling to create invoices that ensure prompt payment? Chaser offers a solution with its customizable invoice template library. Chaser editable templates save you valuable time and enhance AR organization by providing easily downloadable templates in any format. You can access editable templates tailored to your specific needs and in compliance with major regional standards.

Download your free template

Chaser-How to track invoices and payments-50

Free customizable invoice templates

Chaser provides a comprehensive library of customizable invoice templates easily downloaded into PDF, Excel, and Word to meet the diverse needs of today's businesses. These templates are specifically designed for a range of sectors, including retail, the service industry, dental, HVAC, and manufacturing, incorporating industry best practices and relevant fields.

By using Chaser library, businesses can simplify their accounts receivable processes, improve efficiency, and accelerate payment cycles. Chaser customizable invoice template library empowers businesses to revolutionize their Accounts Receivable (AR) management.

By leveraging our diverse collection of professionally designed templates, companies can streamline and simplify intricate AR processes, leading to substantial gains in operational efficiency and a reduction in invoice mistakes. This enhanced efficiency directly contributes to a significant acceleration of payment cycles, ensuring a healthier and more predictable cash flow.
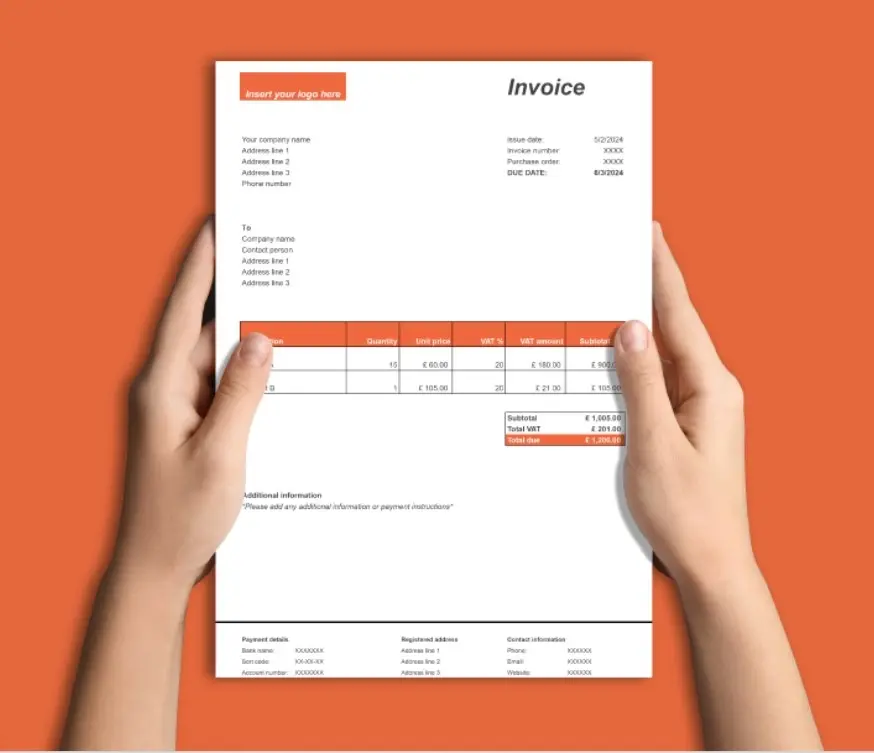
Download your invoice template

Invoice template main-1

How to customize your invoice

Once you've downloaded a Chaser invoice template, customizing it to reflect your brand is straightforward. Here are the key steps to personalize your invoice:

Adding your business logo

  1. Open the template: Open the downloaded template in your preferred format (Word, Excel, or PDF editor).
    1. The document consists of four tabs. The first tab provides guidance on the usage of the sheet, containing essential information regarding its functionality and features.
    2. The other tabs contain invoice templates that are organized by region. We offer options for the United Kingdom, the United States, and Australia. Please select the template that is most appropriate for your region.
  2. Locate the logo placeholder: Most templates have a designated space for a logo, usually at the top.
  3. Insert your logo: In your software (e.g., Microsoft Word), go to "Insert" > "Pictures" and select your logo file from your computer.
  4. Resize and position: Resize the logo to fit the space and adjust its position as needed. Ensure it is clear and visible.

Incorporating brand colors

  1. Identify brand colors: Determine the primary and secondary colors of your brand.
  2. Change template colors:
    1. Backgrounds: In Word or Excel, select the background of sections you want to change. Right-click and choose "Format Shape" or "Format Cells" to adjust the fill color.
    2. Text: Select the text you want to change. Use the font color options in the toolbar to apply your brand colors.
    3. Borders and lines: Adjust the colors of borders or lines by selecting them, right-clicking, and choosing "Format Shape" or similar to modify the color.
  3. Maintain readability: Ensure that color choices do not compromise the readability of the text. High contrast between text and background is crucial.

Selecting brand fonts

  1. Choose brand fonts: Select fonts that match your brand's aesthetic. Stick to one or two font styles for consistency.
  2. Change template fonts: Select the text you want to modify. Use the font selection dropdown in the toolbar to change to your preferred font.
  3. Ensure font compatibility: If sharing the document digitally, choose common fonts that are widely available or embed the fonts in the document to prevent display issues.

Checklist for customization


Best practices for creating an invoice

Creating effective invoices is crucial for ensuring timely payments and maintaining a professional business image. Here are some best practices:

Essential invoice elements

Element

Description

Invoice number

Unique identifier for tracking.

Date of issue

Date the invoice was created.

Customer details

Name, address, and contact information.

Your business details

Name, address, and contact information.

Description of goods/services

Detailed list of items or services provided, including quantity and price.

Total amount due

Sum of all items/services, including taxes and discounts.

Payment terms

Instructions for payment, due date, and any late fees.


Payment instructions

Include clear and concise payment instructions on the invoice. This helps avoid confusion and speeds up the payment process.

Payment options

List all acceptable payment methods:

  • Bank transfer details (account number, sort code/routing number, SWIFT code)
  • Online payment links (e.g., PayPal, Stripe)
  • Check instructions (payee name, address)

Example payment instructions

"Payment can be made via bank transfer to the following account:

Account Name: [Your Business Name]

Account Number: [Account Number]

Sort Code: [Sort Code]

SWIFT Code: [SWIFT Code]

Alternatively, you can pay online using this link: [Payment Link]"

Industry-specific invoice best practices

While the generic best practices above create a firm foundation to make your invoices more accurate and effective, there are certain industry-specific best practices that will help ensure you get paid faster:

HVAC

The HVAC industry’s focus on providing installation of equipment means there are some extra sections that are beneficial to add to your invoice, including:

  • Detailed service descriptions: Clearly itemize all services provided.
    • Type of equipment serviced (e.g., furnace, AC unit, heat pump)
    • Model numbers and serial numbers
    • Specific repairs or maintenance tasks performed (e.g., replaced blower motor, cleaned coils, recharged refrigerant)
    • Parts used, including part numbers and costs
    • Labor hours and hourly rate
  • Permits and inspections: If applicable, include details about any permits obtained or inspections conducted.
    • Permit numbers
    • Inspection dates and results
    • Associated costs
  • Warranty information: Provide warranty information for parts and labor.
    • Duration of warranty
    • Terms and conditions of warranty
    • Contact information for warranty claims
  • Digital documentation: Include links or attachments to digital documentation, such as:
    • Photos of repairs or installations
    • Service reports
    • Inspection checklists
Laundry

Since the laundry businesses are responsible for the condition of their customer items, having service descriptions, condition notes, and even images appended to the invoices is solid best practice.

  • Detailed service descriptions: Clearly itemize all laundry services provided.
    • Include types of laundry services (e.g., wash & fold, dry cleaning, alterations).
    • Specify the weight or number of items processed for each service.
    • List any special handling or treatments (e.g., stain removal, delicate items).
  • Itemized pricing: Break down charges for each service or item.
    • Provide a clear cost per pound or per item.
    • List any additional fees for special services (e.g., express service, oversized items).
  • Customer identity: Ensure accurate and clear customer information is included.
    • Full name, address, and contact details.
    • Unique customer ID or order number.
  • Drop-off and pick-up dates: Include specific dates for when items were dropped off and when they are scheduled for pick-up.
  • Condition notes: Note any pre-existing damage or stains on items upon receipt.
    • This helps avoid disputes regarding damage that occurred before the laundry service.
  • Special instructions: Include any specific customer instructions or requests.
    • This might involve water temperature, detergent type, or specific folding preferences.
  • Inventory list: For commercial accounts, include a detailed inventory list of items processed.
    • This helps track items and ensures all items are returned to the customer.
Dental

In addition to the general invoicing best practices, dental practices should include the following details for efficient and accurate billing:

  • Detailed procedure codes: Clearly list each dental procedure performed with the corresponding CDT (Current Dental Terminology) code. This ensures clarity for insurance claims and patient understanding.
  • Insurance information: Include fields for patient insurance details such as the provider name, policy number, and group number. Also indicate if the claim has been submitted to the insurance company.
  • Patient responsibility breakdown: Itemize what portion is covered by insurance and what the patient's out-of-pocket expense is. This helps prevent confusion and payment delays.
  • Appointment details: Adding the date and time of the appointment can serve as a reminder and verification of the service provided.
  • Outstanding balances: If the patient has an existing balance, include this information clearly on the invoice.

Setting due dates and late fees

Establish clear payment due dates. It is common to set payment terms like "Net 30," meaning payment is due 30 days after the invoice date.

Late fees

State any penalties for late payments. This can be a fixed fee or a percentage of the total amount. Clearly communicate the late fee policy on the invoice to avoid disputes.

Example due date and late fee clause

"Payment is due within 30 days of the invoice date. A late fee of 5% will be charged for payments received after the due date."

Keeping branding consistent

Consistent branding reinforces your company's identity and professionalism. It helps clients recognize and remember your business.

Branding elements

  1. Logo: Place your logo prominently on the invoice.
  2. Colors: Use your brand's color palette.
  3. Fonts: Stick to your brand's font styles.

Branding consistency checklist

  • Add business logo
  • Use brand colors
  • Choose brand fonts
  • Maintain a consistent layout and style

Delivery and follow-up

The first step in ensuring timely payment is the prompt and efficient delivery of the invoice. Businesses have the option to send invoices via email or traditional mail. 

While traditional mail may be suitable in some cases, email is generally preferred for its speed, convenience, and cost-effectiveness. Sending invoices via email allows for instant delivery and can often include clickable payment links, streamlining the payment process for the client.

Following up and automating reminders with Chaser

After sending the initial invoice, consistent follow-up is essential. Manual follow-ups, however, can be time-consuming and prone to errors. This is where Chaser comes in. Chaser is designed to automate the process of sending payment reminders. 

Once an invoice is sent, Chaser can be configured to automatically send email and SMS reminders at preset intervals. This ensures that payment deadlines are clearly communicated and helps to reduce the risk of late payments, thus improving cash flow and reducing the time spent on manual follow-ups. 

Chaser can significantly optimize the accounts receivable process by automating these vital communication tasks.

Your template for accounts recievable success 

By utilizing Chaser's customizable invoice template library, businesses can significantly enhance their Accounts Receivable processes. These free templates, available in multiple formats and tailored for various industries, save time and ensure compliance with regional standards. 

Ready to streamline your invoicing process and improve your cash flow? Download Chaser's free customizable invoice templates today and start implementing these best practices. Once you've sent your invoices, Chaser can further assist with automating your payment chasing and credit control, ensuring you get paid on time, every time. 

Download your industry-specific templates and let Chaser automate payment reminders — no more chasing invoices manually